Craft Your Own Dual-Format 3D Printed Pinhole Camera for Wigglegrams
Introduction
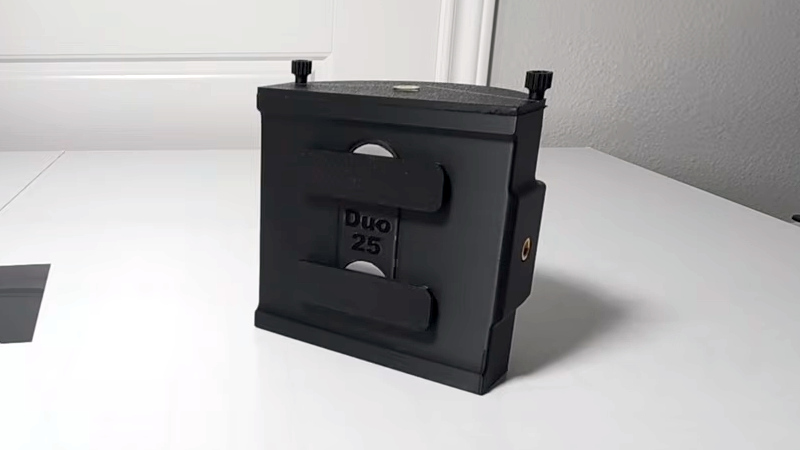
Building a pinhole camera is a classic photography project that brings you back to the basics of image formation. Now, with a 3D printer, you can elevate this experience by creating a clever dual-camera design that not only captures standard pinhole photos but also lets you make wigglegrams—those fun, slightly animated stereoscopic images. This guide, inspired by a design from Socialmocracy, walks you through constructing a single box that houses two side-by-side pinhole cameras. Whether you orient it horizontally for panoramic shots or vertically for stereo pairs, you'll be able to create unique, playful images. Best of all, the maker is considering releasing the STL files, so your input could help bring this project to the community.

What You Need
- 3D printer and filament (PLA recommended)
- STL files for the dual pinhole camera (request from maker)
- Thin metal sheet (e.g., brass or aluminum) for pinhole discs
- #10 sewing needle or fine pin
- Small neodymium magnets (e.g., 6mm diameter x 2mm thick)
- Thumbscrews (two, matching printed threads)
- 4×5 inch photographic paper (or cut-down sheets)
- Black electrical tape or craft tape
- Scissors or hobby knife
- Sandpaper (fine grit)
- Ruler or calipers
- Darkroom or changing bag for loading paper
- Developer, stop bath, and fixer chemicals (optional for processing)
How to Build and Use the Dual Pinhole Camera
Step 1: Print the Camera Body
Begin by downloading the STL files from the maker’s page (if released) or designing your own based on the specifications: two identical camera chambers side by side, each sized for 4×5 inch photographic paper. Print the two halves (left and right) using your preferred 3D printer settings. Use a layer height of 0.2mm for a good balance of speed and quality. Ensure the print is light-tight—any gaps will ruin your photos. After printing, sand any rough edges lightly with fine-grit sandpaper.
Step 2: Create the Pinhole Discs
For each camera, you need a pinhole disc. Cut a small square (about 1×1 cm) from thin metal sheet. Use a sewing needle to carefully pierce a tiny hole through the center. The hole should be as round and clean as possible—a magnifying glass helps. The ideal pinhole diameter for a 4×5 inch focal length (roughly 100mm) is around 0.4mm. If the hole is too large, images will be blurry; too small and exposure times become very long. Sand the burrs from the back of the disc with fine sandpaper. You can blacken the disc with marker or paint to reduce reflections.
Step 3: Assemble the Camera
Attach one pinhole disc to the front of each camera chamber, centered over the hole (usually a small circular opening). Use a tiny bit of tape or a dab of glue to secure it from the inside. The magnet-based shutter design means you'll need to install magnets: glue a small magnet to the inside of the shutter slide (a printed piece that covers the pinhole) and another on the camera body so they attract and hold the shutter closed. Alternatively, you can use a simple tape flap as a shutter. Next, attach the two camera halves together using thumbscrews through pre-drilled holes—this allows you to open the camera for loading paper. Ensure all seams are taped with black tape to prevent light leaks.
Step 4: Load the Photographic Paper
In complete darkness (or using a changing bag), open the camera by removing the thumbscrews. Slide two 4×5 inch sheets of photographic paper into each chamber, emulsion side facing the pinhole. The paper should be held flat against the back wall. Close the camera, tighten the thumbscrews, and ensure the shutter (magnet slide or tape) is covering both pinholes. The camera is now ready for use.
Step 5: Choose Your Format
This dual camera offers two modes: Panoramic and Stereo.
- Panoramic mode: Hold or mount the camera horizontally (landscape orientation). Both cameras capture the same scene side by side, but you will only use one of the resulting images (or stitch them for a wider view if you align them carefully). Each chamber captures a slightly different angle, giving a panoramic effect when merged.
- Stereo mode: Hold or mount the camera vertically (portrait orientation). Now the two chambers are stacked top and bottom. When viewed as a stereo pair (side by side or using a special viewer), they create a 3D wigglegram—rapidly switching between the two images gives a wiggling, depth illusion.
Select your orientation before exposing.
Step 6: Take the Photos
Place the camera on a stable surface or tripod. Compose your scene. The exposure time depends on light conditions and ISO of your photographic paper (typically around 6-12). For bright sunlight, start with 30 seconds. For cloudy days, 2-5 minutes. Open the shutter by sliding the magnet or lifting the tape flap. Time the exposure carefully using a watch. Close the shutter. If you want a wigglegram, make two separate exposures one after the other by moving the camera slightly between shots (or use the stereo mode where both chambers expose simultaneously). For simultaneous exposure, both shutters must open together—design a single slide that covers both pinholes.
Step 7: Develop the Paper
Back in the darkroom (or a changing bag), remove the photographic paper. Process it using standard black-and-white paper developer, stop bath, and fixer. Follow the chemical manufacturer’s instructions. After fixing, wash the prints and dry them. You now have two pinhole images. For wigglegrams, scan both and create an animated GIF or use software to alternate frames.
Tips for Success
- Light-tightness is everything – Even a tiny pinhole of light will fog your paper. Use black tape over all seams and check with a flashlight in a dark room before loading film.
- Experiment with pinhole size – If your images are too blurry, try a smaller hole. If exposure times are impossibly long, a slightly larger hole (up to 0.5mm) may work.
- Use a tripod – Pinhole exposures are long; any movement will ruin sharpness. A tripod or stable surface is essential.
- Mark your orientation – Label the top of the camera so you know which orientation you used for panoramic vs stereo.
- Scan both negatives for wigglegrams – Align the two images in photo editing software, then export as a GIF with short frame delays (e.g., 0.2 seconds) for a smooth wiggle effect.
- Share your feedback – The maker is accepting comments on whether to release the STLs. Visit the original post and let them know you’re interested!
Ready to dive into pinhole wigglegrams? This dual camera opens up a world of creative possibilities. Start building today and capture images that pop with depth and motion.
Related Articles
- Ubuntu Websites Under Cyber Attack: What Users Need to Know
- Critical Cisco SD-WAN Auth Bypass Under Active Attack: Patch Now
- How to Mitigate Cisco Catalyst SD-WAN Controller Authentication Bypass Vulnerability (CVE-2026-20182)
- Securing Your Linux System Against the Copy Fail Vulnerability: A Step-by-Step Guide
- CopyFail Linux Vulnerability: Critical Unpatched Flaw Poses Widespread Threat
- Shielding Medical Infrastructure: A Tactical Guide to Wiper Attack Defense Inspired by the Stryker Incident
- Behind TrueChaos: How a Zero-Day in TrueConf Targeted Southeast Asian Governments
- Securing Linux Against Copy Fail: A Step-by-Step Defense Guide